Working remotely has become a standard these days, and accessing our computers remotely has become a necessity. In the life of a developer, this necessity is even greater if you add to your list a secondary computer, the office computer, a home lab, test machines, virtual machines, and so on. Although the terminal is enough to do a remote job, there are situations when you need to actually see the screen and run some desktop applications on it. In the following sections, I will detail how to install and configure Team Viewer on Linux remotely so you can access it easily using the application. Team Viewer is one of the most popular remote access and control applications, and the best thing about it is that it is cross-platform!
Prerequisites
- sudo credentials to access the remote machine
- a Team Viewer account
- a terminal
For this article, I’ll be using two hosts, one running Ubuntu 20.04LTS and one running Fedora 34. The machines will be accessible via SSH.
Ubuntu
Step 1: Connect to your host
Open a terminal and connect to your host using SSH.
The host must have an SSH Server running for this to work as it is not installed by default.
ssh username@host
Step 2: Install TeamViewer
Install Team Viewer using the latest official package.
cd /tmp
wget https://download.teamviewer.com/download/linux/teamviewer_amd64.deb
sudo apt install ./teamviewer_amd64.deb -y
sudo teamviewer daemon start
# Make teamviewer start when the system turns on
sudo teamviewer daemon enable
Step 3: Set up TeamViewer
Next, we are going to use the TeamViewer CLI to connect the host to the official account.
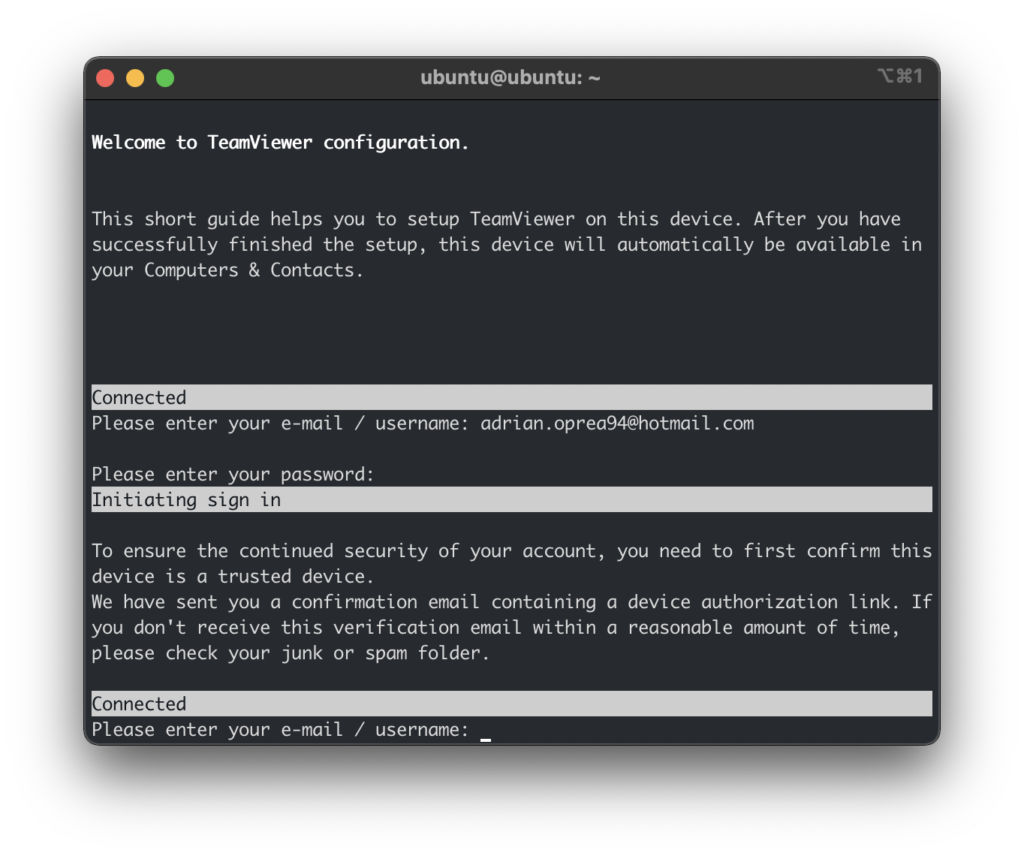
sudo teamviewer setupYou’ll be asked to accept the License Agreement and then to input your username and password. The first login will fail as TeamViewer requires the user to trust devices before adding them to the account list.

Step 4: Trust the device
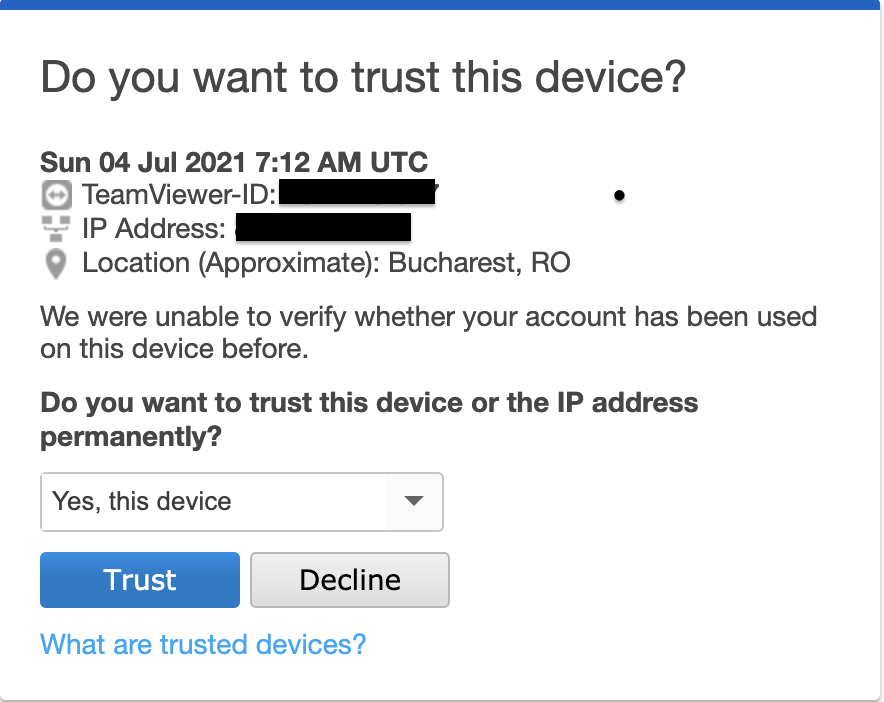
At this point, you will have to open your email and trust the device.

Once you’ve added the device to the trusted list, type the username and password into the terminal. Select yes when asked if you want to add the host to your computers group. And that’s it!
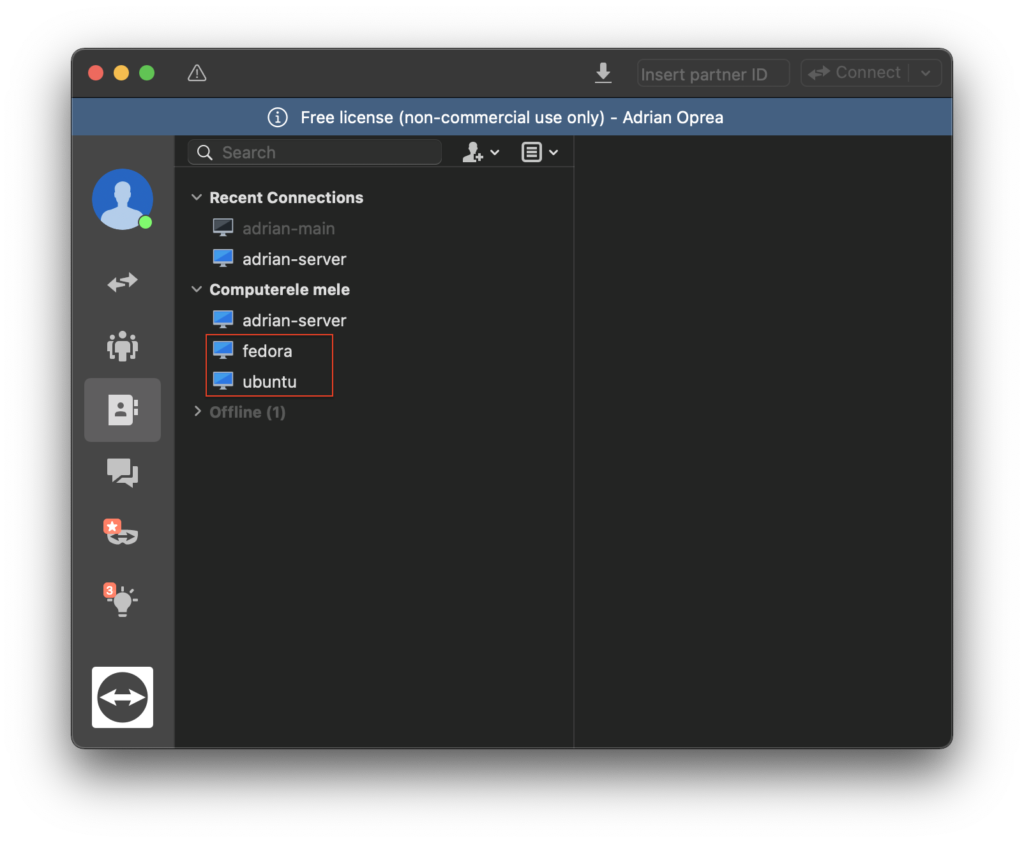
Now, if you log in to the TeamViewer app, you’ll see the newly added host.

Other Commands
# Stop Teamviewer
sudo teamviewer daemon stop

# TeamViewer won't start automatically when the system turns on
sudo teamviewer daemon disable

# Uninstall TeamViewer
sudo apt purge teamviewer -y
Fedora
Step 1: Connect to your host
Open a terminal and connect to your host using SSH.
The host must have an SSH Server running for this to work as it is not installed by default.
ssh username@host
Step 2: Install TeamViewer
Install Team Viewer using the latest official package.
cd /tmp
wget https://download.teamviewer.com/download/linux/teamviewer.x86_64.rpm
sudo dnf -y install teamviewer.x86_64.rpm
sudo teamviewer daemon start
# Make teamviewer start when the system turns on
sudo teamviewer daemon enable
Step 3: Set up TeamViewer
Next, we are going to use the TeamViewer CLI to connect the host to the official account.
sudo teamviewer setupYou’ll be asked to accept the License Agreement and then to input your username and password. The first login will fail as TeamViewer requires the user to trust devices before adding them to the account list.

Step 4: Trust the device
At this point, you will have to open your email and trust the device.

Once you’ve added the device to the trusted list, type the username and password into the terminal. Select yes when asked if you want to add the host to your computers group. And that’s it!
Now, if you log in to the TeamViewer app, you’ll see the newly added host.

Other Commands
# Stop Teamviewer
sudo teamviewer daemon stop

# TeamViewer won't start automatically when the system turns on
sudo teamviewer daemon disable

# Uninstall TeamViewer
sudo dnf remove teamviewer -y
Summary
Installing TeamViewer using the terminal is pretty straightforward, and the CLI is straightforward to use. The TeamViewer team provides some more options that can be inspected using man teamviewer or teamviewer --help for a shorter version.
